
I decided that I'm going to start teaching you some hairstyles, as well my usual posts. I will probably upload one every 2 weeks, probably on a Saturday or a Sunday.
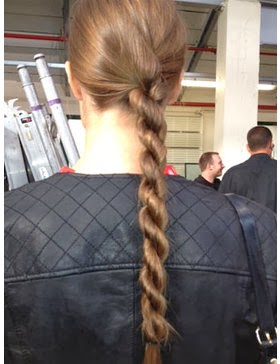
This hairstyle is called a rope braid, or a rope braid twist. It's really easy and only takes 2 minutes to do, yet will leave all of your friends amazed. Here's a picture of my hair in two mini rope braids.
You start by splitting your hair into two equal sections. Make sure they're as even as possible, otherwise the braid will be harder to complete later on. You then twist each piece of hair the same way. So that's both to the left or both to the right. (If you twist the strands in opposite directions, such as towards each other, it won't work)
This is probably the hardest bit. Take the two strands and wrap them around the opposite way. So if you twisted both strands to the left, wrap them around each other to the right. Repeat these steps as many times as you need to and then you're done. You might have to unravel the twists and re-twist them as it's hard holding really long twists and wrapping them around each other with only 2 hands.
Credit to Elle UK for this image.
There are many ways you can incorporate rope braids into your hair. You could do it in a ponytail at the back or side of your hair (as seen in the image), as a hairband across your head, one from either side of your head that meet in the middle, or in the strands of a bun or normal braid. The possibilities are endless!
Thanks for reading, I hope you enjoyed this post! Leave comments below with your attempts on a rope braid and what other blog posts you'd like to see in the future.
Love from Daisy x


Post a Comment